
Sun Prints and Solar Energy (Art + Books Series)
This week we did a project loosely tied to one of my own books!

I’ve had the materials for this project for over a year, but this week we finally got around to creating sun prints using photo-sensitive paper.
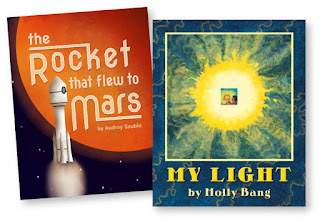
Besides The Rocket that Flew to Mars, Molly Bang's My Light is another great book to read before doing this activity. Both books mention solar panels as a source of energy, and My Light especially focuses on how humans use the sun’s energy in various forms to create electricity.
For this project, my goal was to show my kids in a very visible way that the sun’s energy causes the paper to change.
Before we got started, we talked about solar panels and the fact that the sun’s energy hitting the solar panels causes them to change. In solar panels, that change creates an electrical current, but on photo-sensitive paper, the sun’s energy causes the paper to change color. A leaf laid across the paper blocks the sunlight from that section of the paper, creating a shadow image.
This is an activity that goes fast!
The photo-sensitive paper only needs a couple minutes of sunshine to create a print. So, to avoid blurring the pictures, I had my kids gather their materials before getting started. We even got a couple half-sheets of regular paper for them to plan their pictures so that we wouldn’t place the photo paper in the sun too soon!
Once they were ready, I laid out the photo paper one print at a time.
We did four or five prints to start, waited a couple minutes until the paper had visibly faded, then moved the paper to our water tub to soak for a minute, following the instructions on the package.
Then I moved the finished prints to a towel in the shade to dry.

Since the images are done after just a few minutes, you can easily run a couple batches of prints and try different arrangements on the paper.
If you want, you can also turn this project into an experiment to test what happens when the papers don’t get as much sunlight.
In The Rocket that Flew to Mars, I mention that Mars is dusty, which can be a problem for solar panels if there isn’t a way to keep them clean. With this in mind, we left one paper in the shade, where it got very little sunshine. We covered another paper with a couple sheets of wax paper to simulate a dusty solar panel.
When the prints were dried, we found that the shaded paper still picked up some reflected light, but both the shaded and the dusty images looked noticeably less detailed than the ones placed in full sunlight.

We’ve been reading a lot of picture books about space and rockets, and these books frequently mention solar panels.
For spacecraft orbiting Earth and for missions to Mars, solar panels are a critical source of energy. In The Rocket that Flew to Mars, I included a bank of solar panels to power the new bio-dome built on Mars. So, given how important solar energy is to space exploration, we created art using energy from the sun!
I’ve had the materials for this project for over a year, but this week we finally got around to creating sun prints using photo-sensitive paper.
Besides The Rocket that Flew to Mars, Molly Bang's My Light is another great book to read before doing this activity. Both books mention solar panels as a source of energy, and My Light especially focuses on how humans use the sun’s energy in various forms to create electricity.

Art from Sunshine
Materials:- Photo-sensitive paper (we used Nature Print Paper from Dick Blick Art, but Amazon has options as well).
- Materials for creating a picture on the paper (bold, flat shapes like ferns work best).
- A tub of water for rinsing the prints.
For this project, my goal was to show my kids in a very visible way that the sun’s energy causes the paper to change.
Before we got started, we talked about solar panels and the fact that the sun’s energy hitting the solar panels causes them to change. In solar panels, that change creates an electrical current, but on photo-sensitive paper, the sun’s energy causes the paper to change color. A leaf laid across the paper blocks the sunlight from that section of the paper, creating a shadow image.
This is an activity that goes fast!
The photo-sensitive paper only needs a couple minutes of sunshine to create a print. So, to avoid blurring the pictures, I had my kids gather their materials before getting started. We even got a couple half-sheets of regular paper for them to plan their pictures so that we wouldn’t place the photo paper in the sun too soon!
Once they were ready, I laid out the photo paper one print at a time.
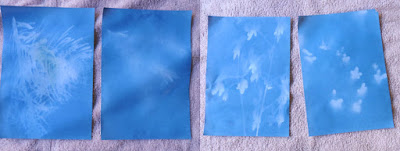
We did four or five prints to start, waited a couple minutes until the paper had visibly faded, then moved the paper to our water tub to soak for a minute, following the instructions on the package.
Then I moved the finished prints to a towel in the shade to dry.

Since the images are done after just a few minutes, you can easily run a couple batches of prints and try different arrangements on the paper.
If you want, you can also turn this project into an experiment to test what happens when the papers don’t get as much sunlight.
In The Rocket that Flew to Mars, I mention that Mars is dusty, which can be a problem for solar panels if there isn’t a way to keep them clean. With this in mind, we left one paper in the shade, where it got very little sunshine. We covered another paper with a couple sheets of wax paper to simulate a dusty solar panel.
When the prints were dried, we found that the shaded paper still picked up some reflected light, but both the shaded and the dusty images looked noticeably less detailed than the ones placed in full sunlight.

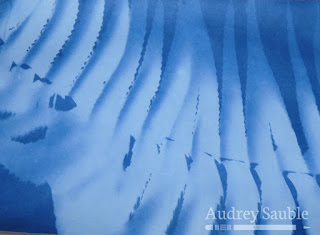
Here's my favorite picture from this project!
Have you tried sun prints before? How did it go?

Have you tried sun prints before? How did it go?
Related posts:
Angler-Fish Craft
Comments
Post a Comment